Aerial Yoga Poses: 23 Poses From Beginner to Advanced, Photographed on Real Students
By Aerial Rishikesh · Updated · 11 min read
Quick answer
Aerial yoga poses are learned in a progression: seated poses in the hammock first, then supported standing balances, then hip openers and splits, then inversions and backbends, finishing with restorative poses such as the cocoon. Beginners can do the seated, standing and restorative poses in a first class; inversions are optional and should always be taught with a teacher spotting.
How to use this list of aerial yoga poses
Every pose below is one we teach at our school in Tapovan, Rishikesh, and the ones pictured are photographs of real students, not stock images or illustrations. We have ordered them the way we teach them: from poses where the hammock carries almost all of your weight, to poses where you hang from it upside down.
That order matters more in aerial yoga than on the mat. Each stage teaches something the next one depends on — how the fabric moves, how to grip it, where it should sit on the body and how to come out of a shape calmly. Skipping ahead is how people get bruised hips and wobbly first inversions. If you are new to the practice, start with our guide to what aerial yoga is and then come back here.
For each pose you will find what it is, how it tends to feel, and one key cue — the instruction we find makes the biggest difference to safety or alignment. These notes are not a substitute for a teacher, especially for inversions.
Aerial yoga poses for beginners: seated and supported
These are the first poses anyone learns. The hammock is set at around hip height, your feet are close to the floor, and the aim is simply to get to know the fabric.
1. Aerial wide-leg seat
What it is: sitting in the hammock as if it were a swing, knees wide, hands holding the fabric on either side. How it feels: surprisingly secure once you stop gripping hard. Key cue: spread the fabric wide across the back of your hips and thighs before you sit — a narrow, rope-like hammock digs in, a spread one supports. This is the seat you will return to, and teach, more than any other.
2. Aerial butterfly (Baddha Konasana)
What it is: seated in the sling with the soles of the feet together and the knees falling open. How it feels: a gentle, passive hip opening as gravity widens the knees. Key cue: keep the fabric under the sitting bones and lengthen up through the spine rather than collapsing back into the hammock.
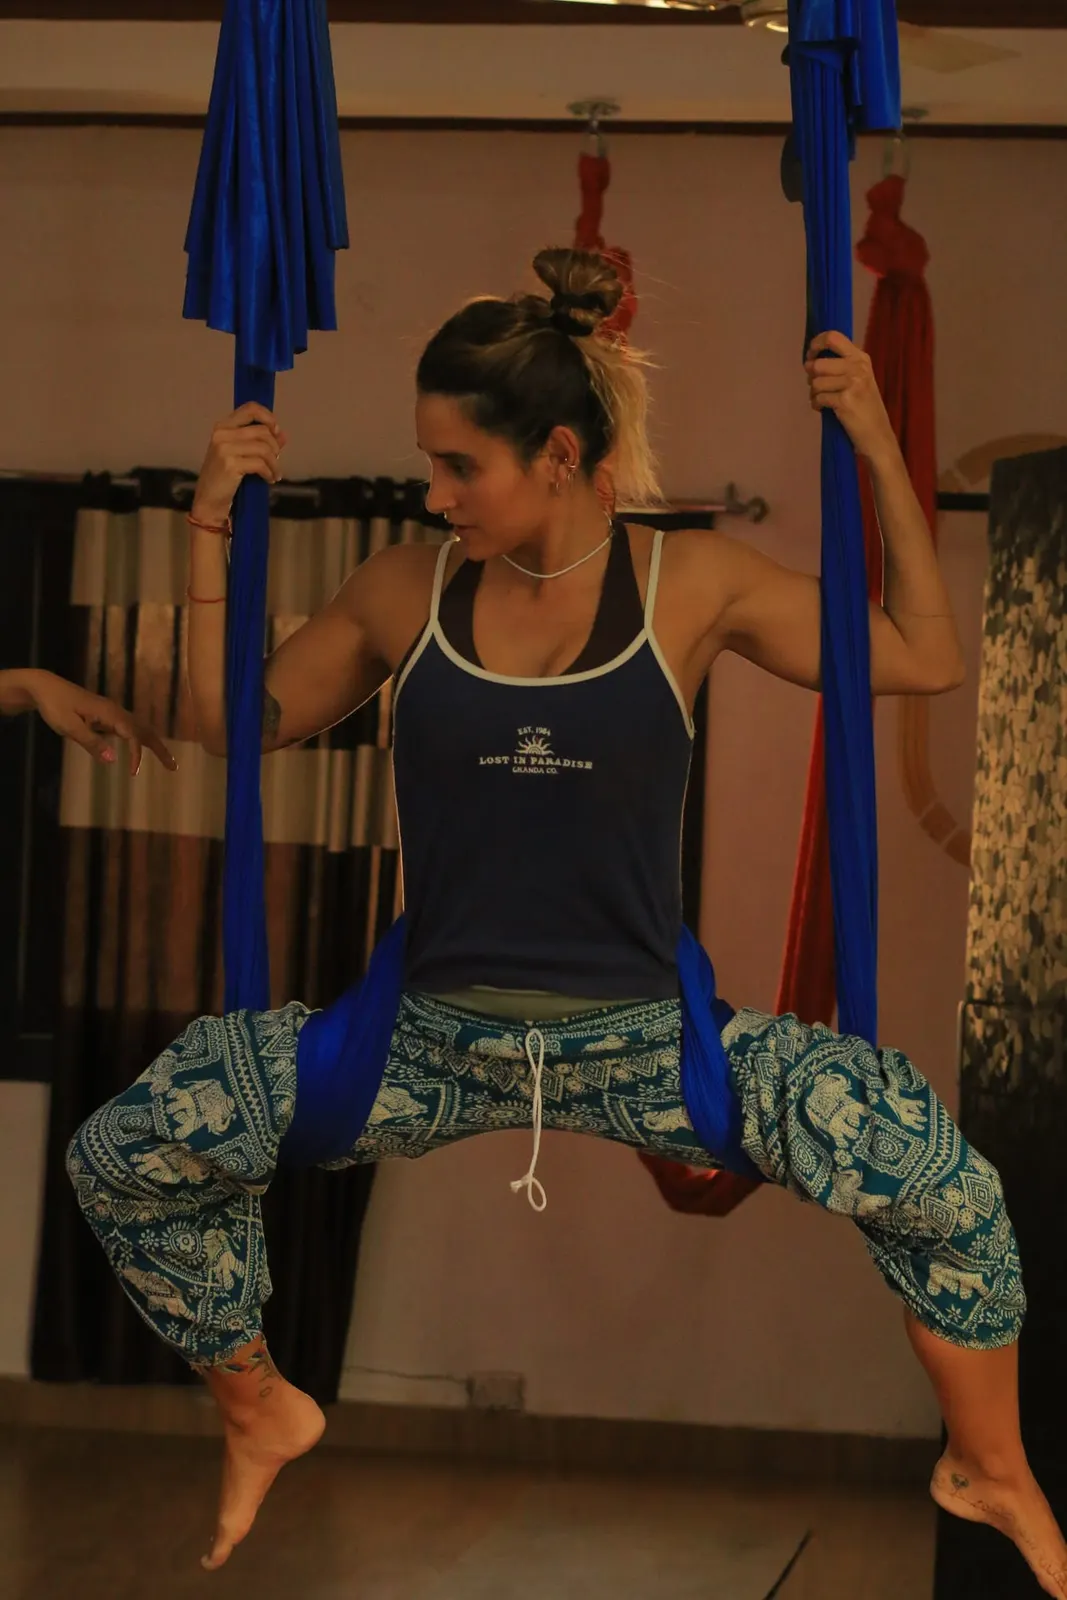
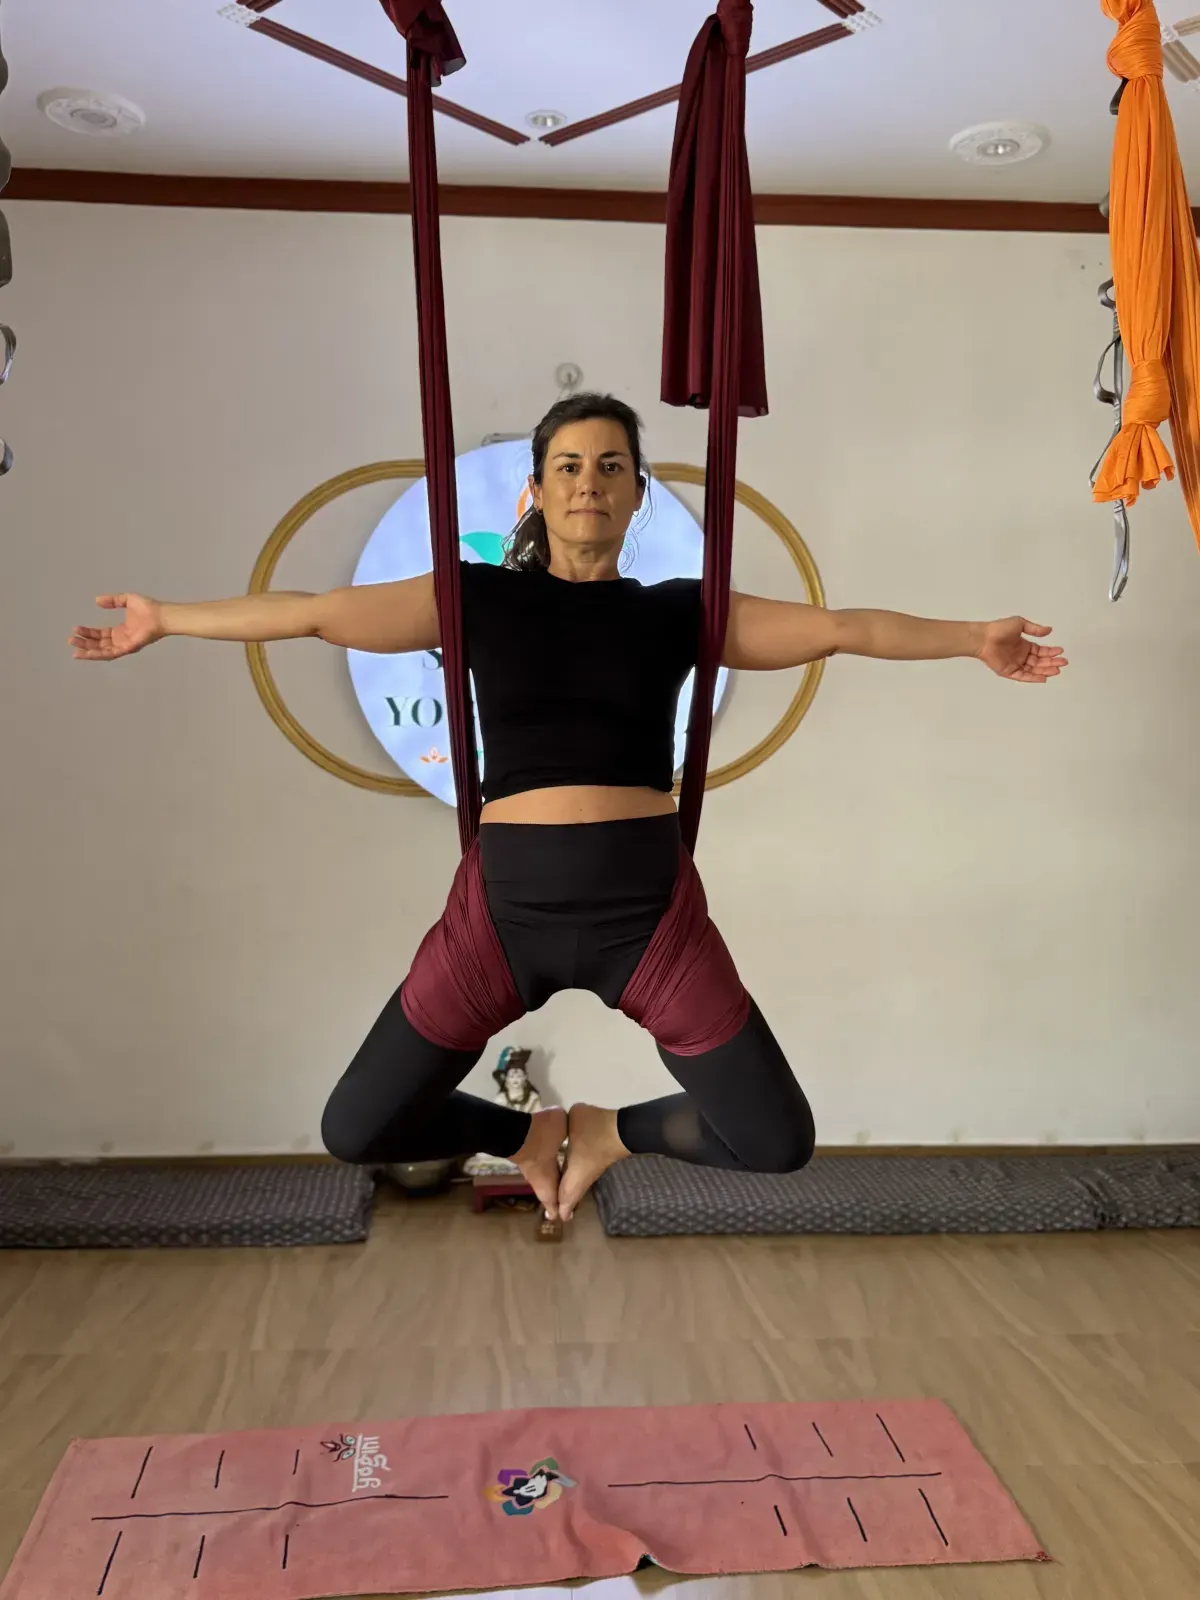
3. Aerial straddle sit
What it is: sitting inside the hammock with the legs extended wide and the arms straight, holding the silks. How it feels: a stretch through the inner thighs and real work in the core and hands. Key cue: keep the arms straight and let the shoulders draw down — bent arms tire quickly and pull the shoulders up to the ears.
4. Straight-arm hang
What it is: standing or kneeling under the hammock, holding it overhead with straight arms and letting some body weight hang. How it feels: an immediate lengthening of the sides of the body, shoulders and spine. Key cue: keep a little engagement in the shoulders rather than dangling passively from the joints, and let the feet stay in contact with the floor.
5. Aerial warrior sling pose
What it is: seated in the sling with one leg reaching down to the floor and the arms extended, a warrior shape that is half on the ground and half in the air. How it feels: steady at first, then more demanding as you take weight out of the grounded foot. Key cue: press the grounded foot firmly into the mat and keep the hips level in the fabric.
Standing balance poses in the hammock
Once you trust the fabric, it moves from under you to beside you. In standing poses the hammock supports a hip or a foot, so familiar postures become balance work. Expect to wobble — the moving prop is the point.
6. Aerial standing split
What it is: the hammock under one hip at the front, the opposite leg lifting behind you as the torso folds forward. How it feels: supported but alive — the hammock shifts as your weight does. Key cue: keep the standing leg working and the hips square; it is easy to let the lifted hip roll open.
7. Standing split with the back foot in the silk
What it is: the reverse arrangement — the back foot rests in the hammock while you fold over the standing leg, hands on the silk or the floor. How it feels: the fabric lifts the back leg higher than you could alone, so the standing leg has to take charge. Key cue: lower the hammock if the standing knee locks or the pelvis twists; height comes later.
8. Tree pose with silks
What it is: a standing tree pose holding one silk in each hand. How it feels: familiar, until you notice how much the moving fabric asks of your feet and core. Key cue: use the silks for lightness, not to hang off — the balance should come from the standing foot.
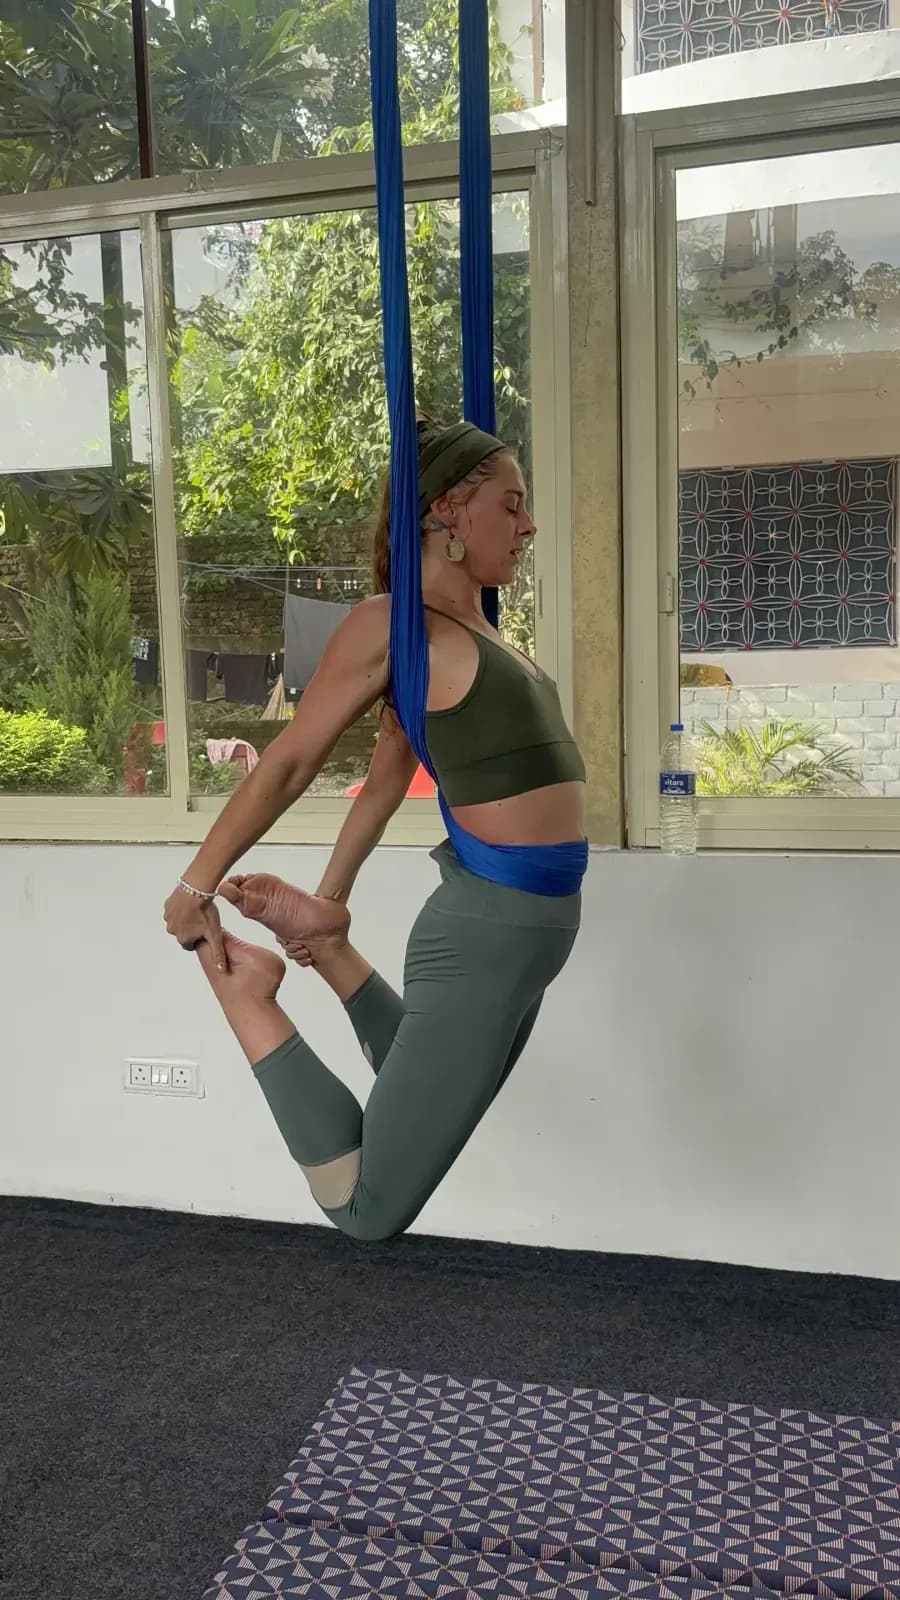
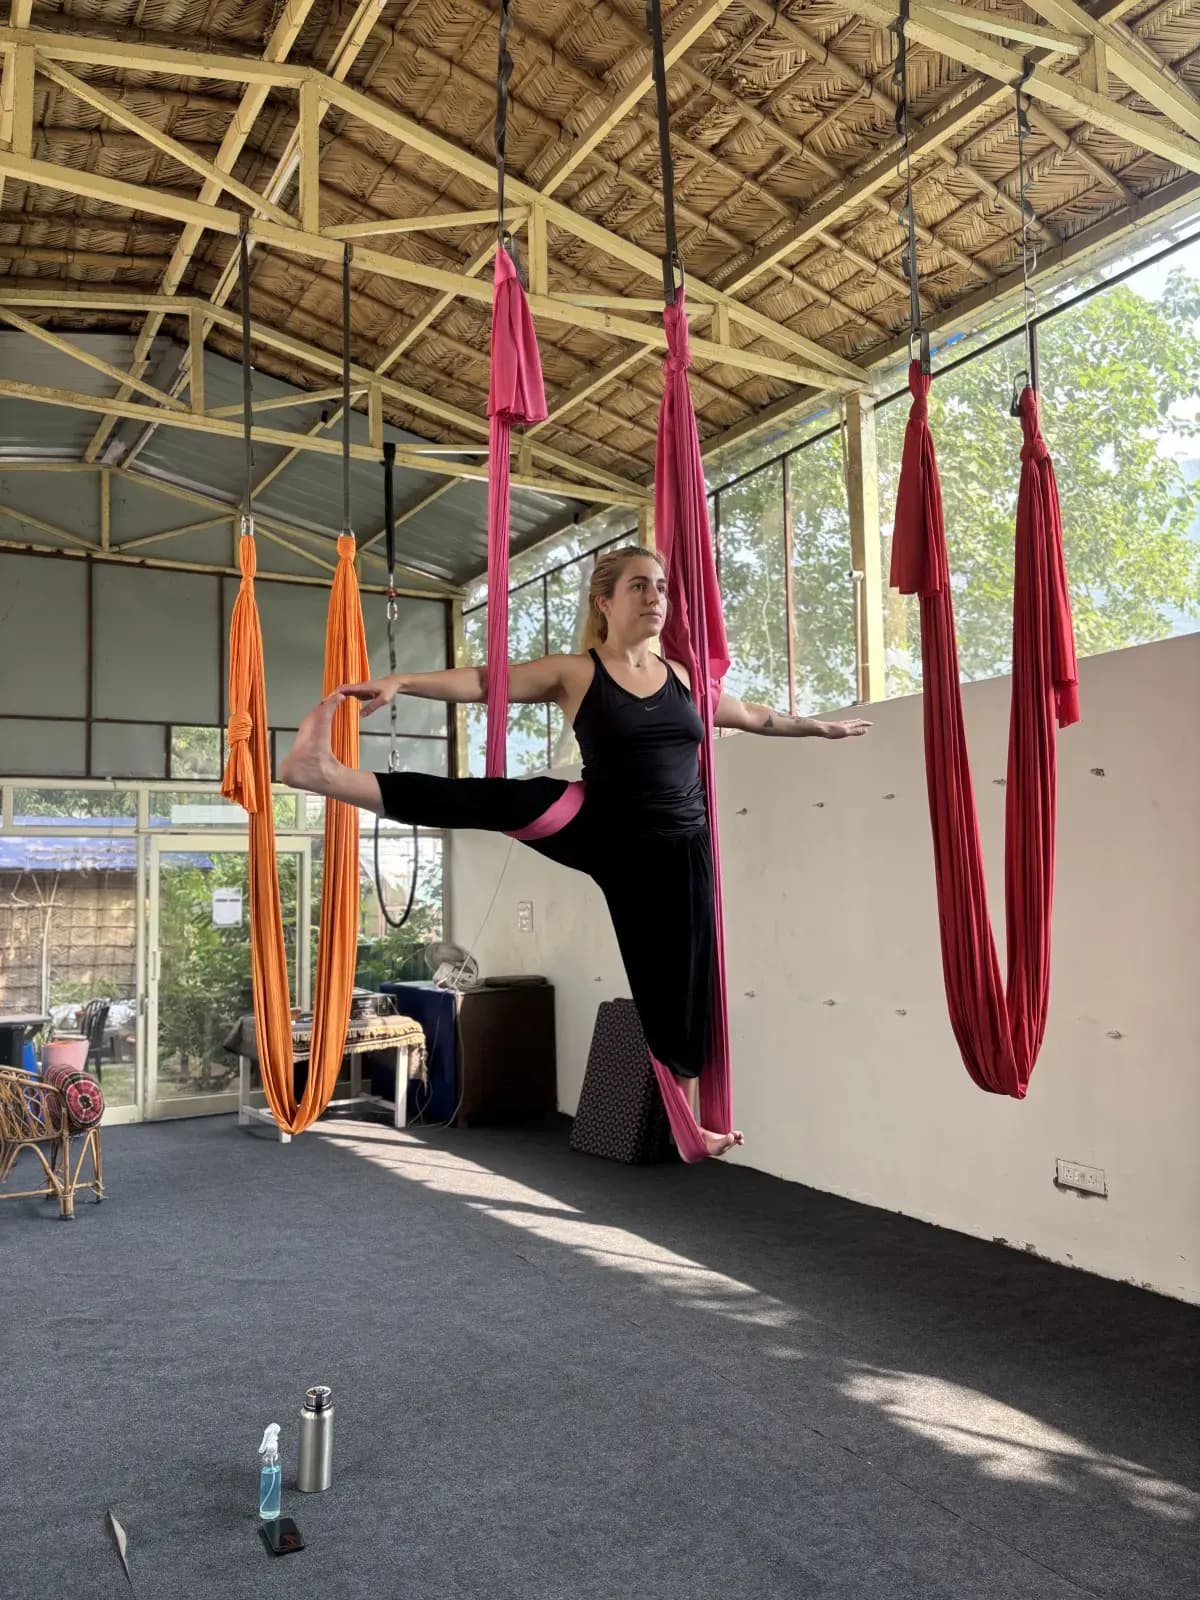
9. Aerial dancer’s pose (Natarajasana)
What it is: the hammock at the front of the hips while you catch the back foot and lift it into a bound backbend. How it feels: a combined shoulder opening, backbend and balance — one of the most photographed poses for good reason. Key cue: lift through the chest before you kick the back foot up, so the backbend spreads through the spine rather than pinching the lower back.
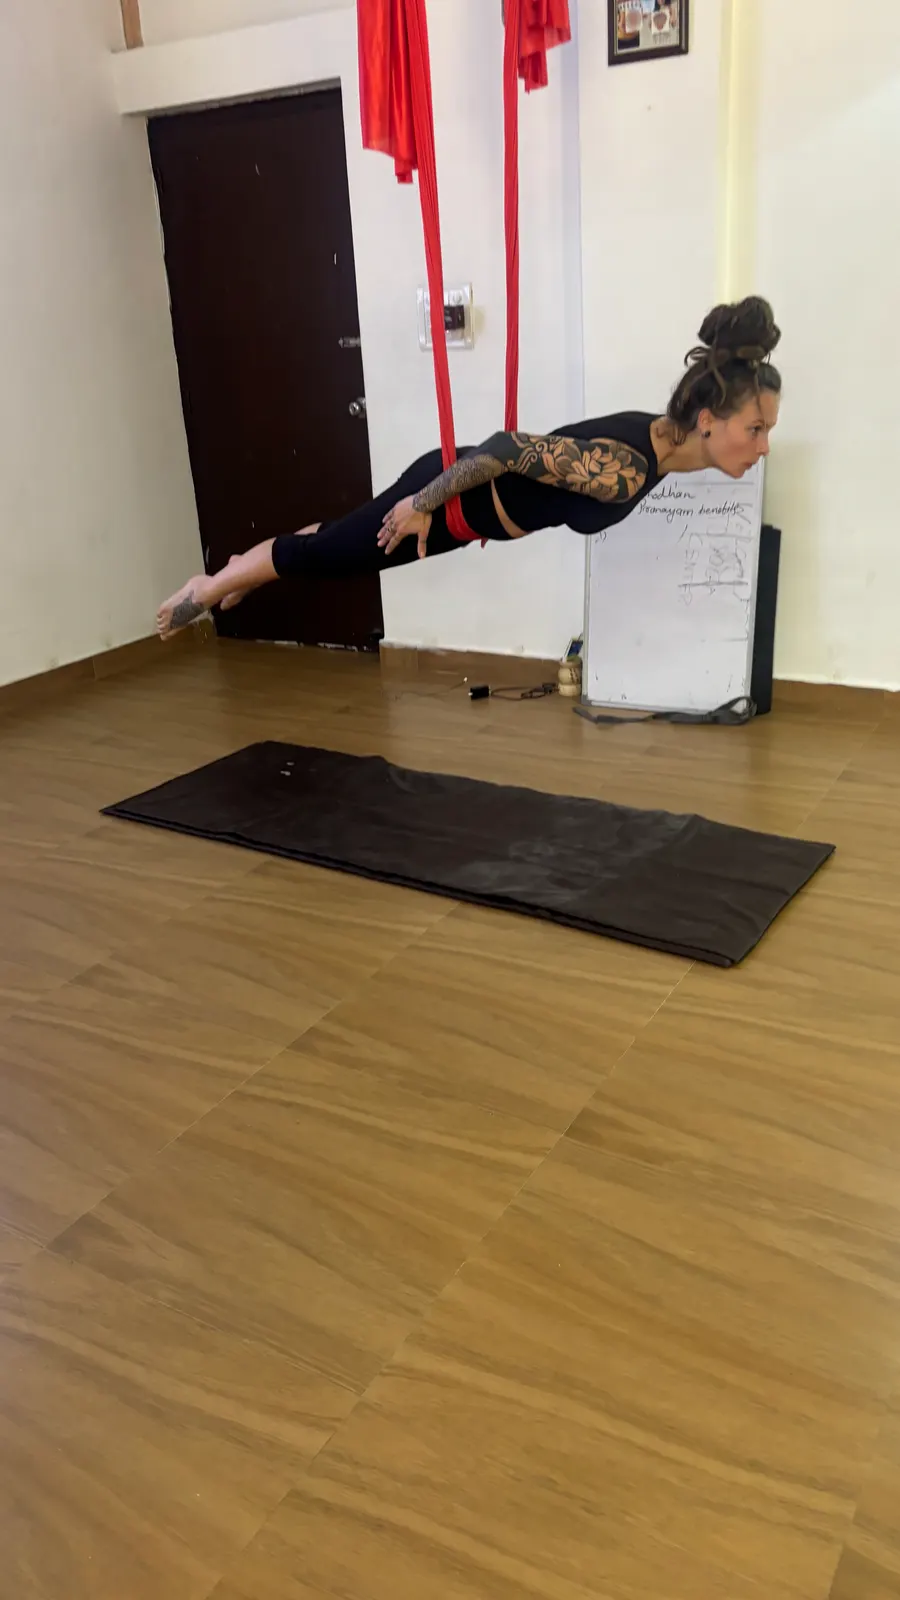
10. Flying superman
What it is: lying belly-down across the hammock at the hips, arms reaching forward and legs extended behind. How it feels: genuinely like flying, and hard work for the whole back of the body. Key cue: place the fabric across the hip creases, not the belly — too high and it presses uncomfortably, too low and you tip forward.
Hip openers and flexibility poses
Here the hammock acts as a block, a strap and a partner at once. Because it takes part of your weight, muscles can release into a stretch rather than bracing against it. Move slowly: a supported stretch can go further than you are used to, so let sensation, not ambition, set the depth.
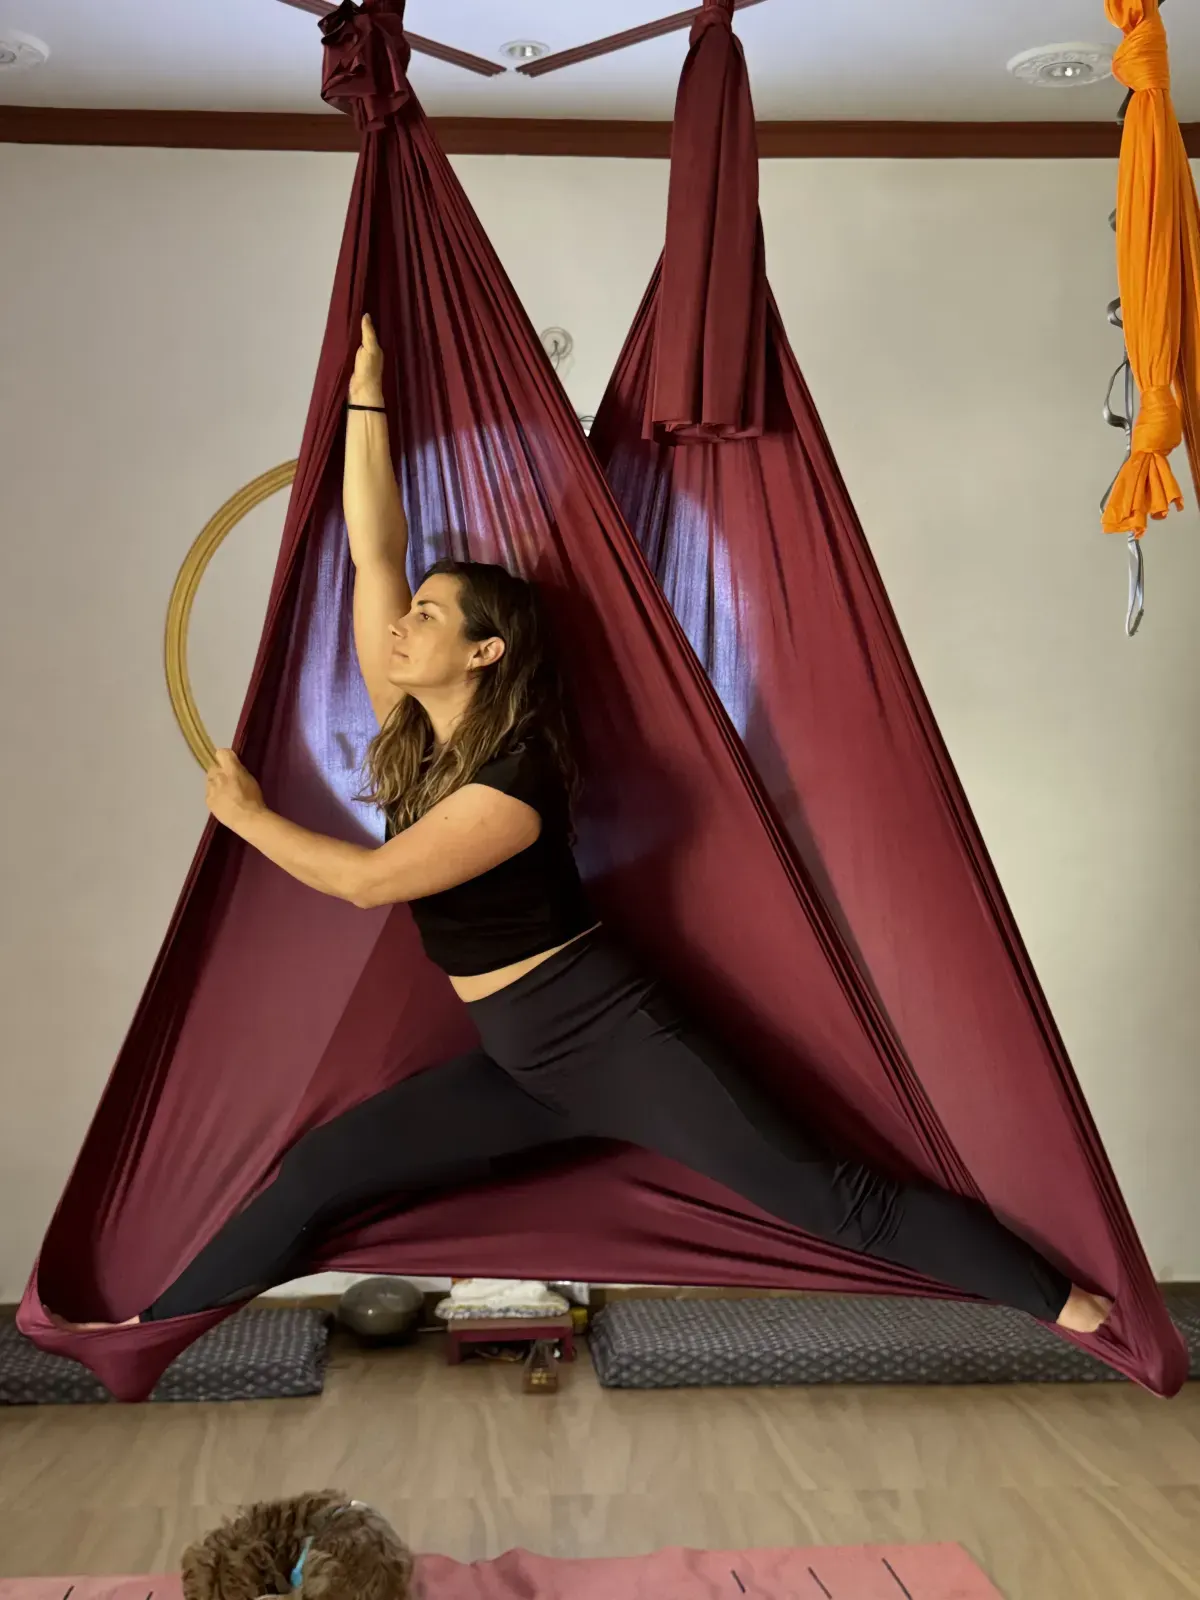
11. Aerial wide-leg straddle
What it is: a wide straddle with the fabric spread into a triangle that carries the body. How it feels: a deep inner-thigh and hip release. Key cue: spread the fabric evenly before settling into it, and keep breathing into the stretch rather than pushing the legs wider.
12. Aerial split balance
What it is: a split with one leg hooked in the hammock, the fabric holding part of the leg’s weight. How it feels: a long, strong stretch through the hamstrings and hip flexors that would be far harder on the floor. Key cue: lower the hammock to reduce the range; never bounce into a split.
13. Flying pigeon
What it is: the front shin wrapped in the hammock, the back leg extended, the arms reaching up the silks. How it feels: a hip opener and a shoulder stretch in one. Key cue: keep the front foot flexed to protect the knee, and spread the fabric along the shin rather than letting it gather at the ankle.
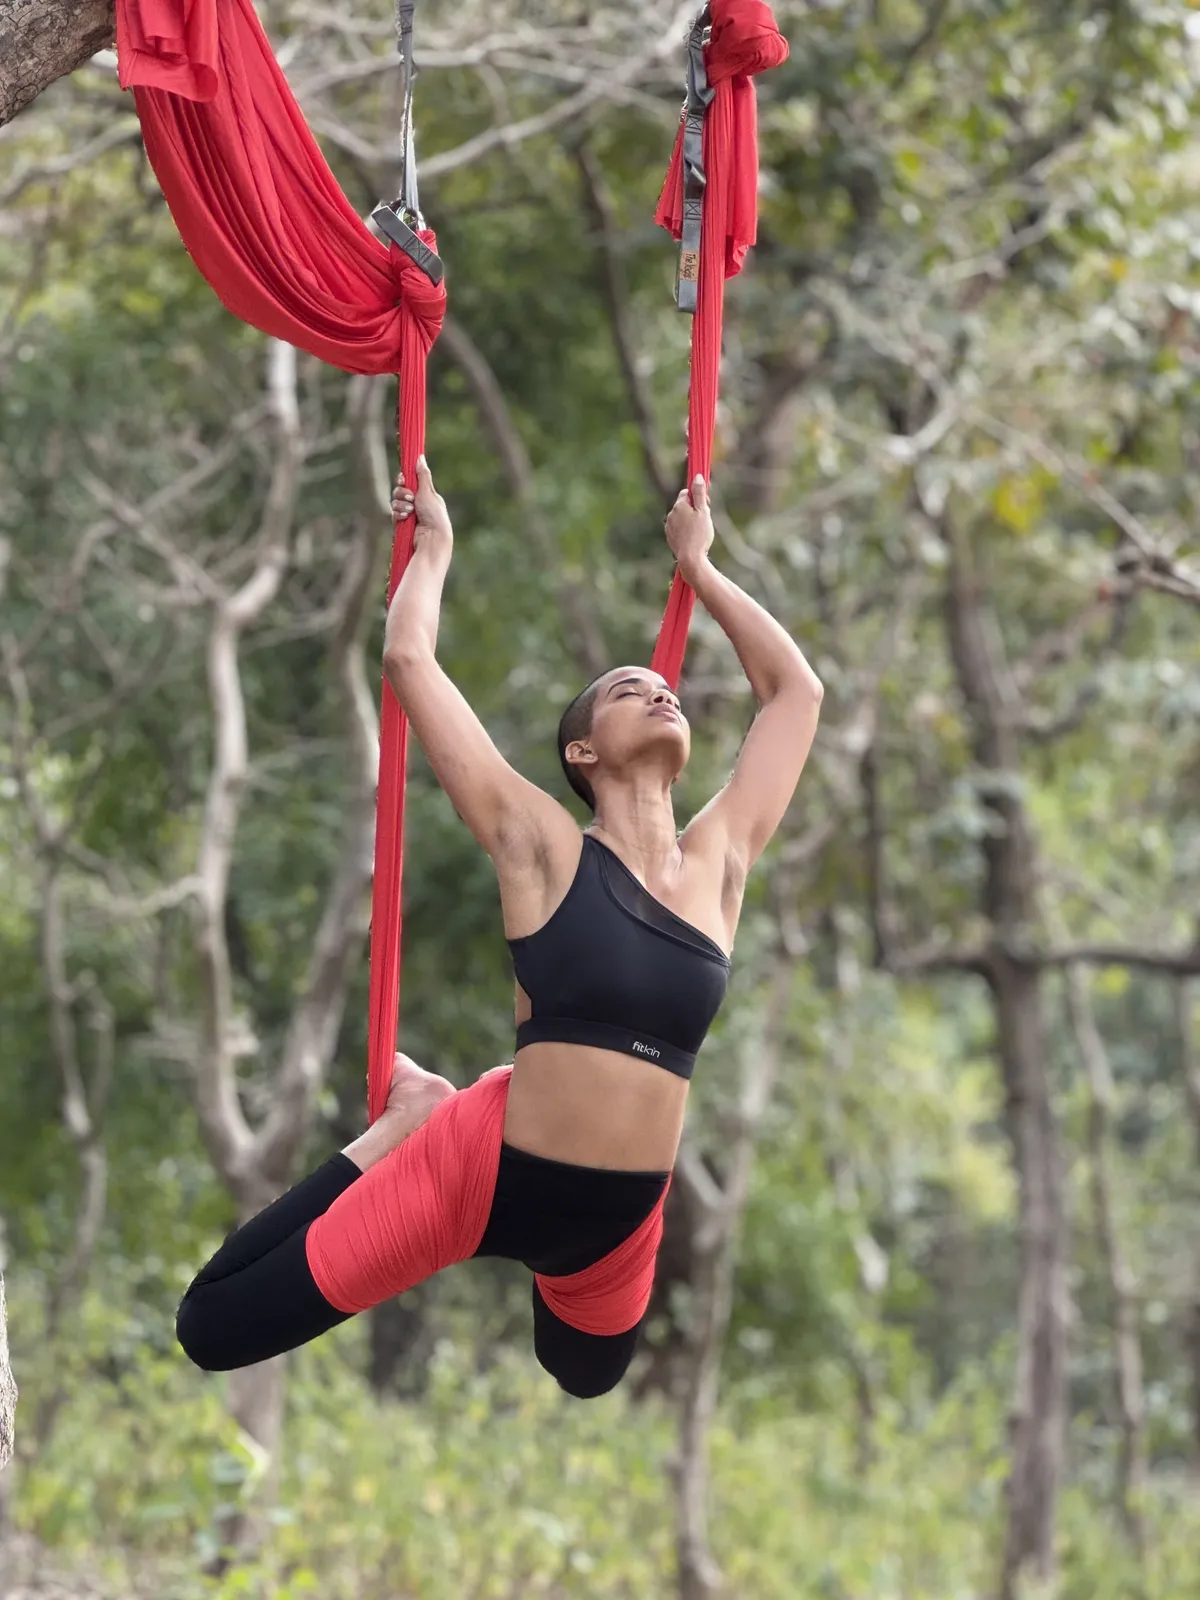
14. Aerial pigeon backbend
What it is: a progression of flying pigeon in which the chest lifts and arches back, holding the silks. How it feels: expansive, and often makes students laugh. Key cue: only take the backbend once the hip position feels stable; the base comes first.
Aerial yoga inversion poses and backbends
Inversions are what most people picture when they think of aerial yoga, and the reason many come to it. In a supported inversion you hang from the hips or legs, so the spine lengthens under its own weight without loading the head or neck. They are optional in every class we teach, always entered and exited step by step, and always spotted while you are learning. Read the contraindications in the safety section below before trying any of them.
15. Supported aerial backbend
What it is: the legs wrapped securely in the hammock while the torso arches back and the chest opens. How it feels: a safe route into a deeper backbend than most people manage on the mat. Key cue: check the leg wraps before leaning back — the wraps are what keep you secure.
16. Spotted aerial backbend
What it is: the same family of backbend, with a teacher’s hands guiding the student in and out. How it feels: reassuring; most first-timers try their first backbend this way. Key cue (for teachers): stand where you can support the back and head without blocking the student’s exit. Learning exactly where to stand is a core part of teacher training.
17. Inverted aerial backbend
What it is: a full inversion with the feet hooked in the hammock and the body hanging upside down in a backbend. How it feels: a strong decompression of the spine, and a definite sense of achievement. Key cue: come up slowly and sit for a few breaths afterwards; brief light-headedness on returning upright is common.
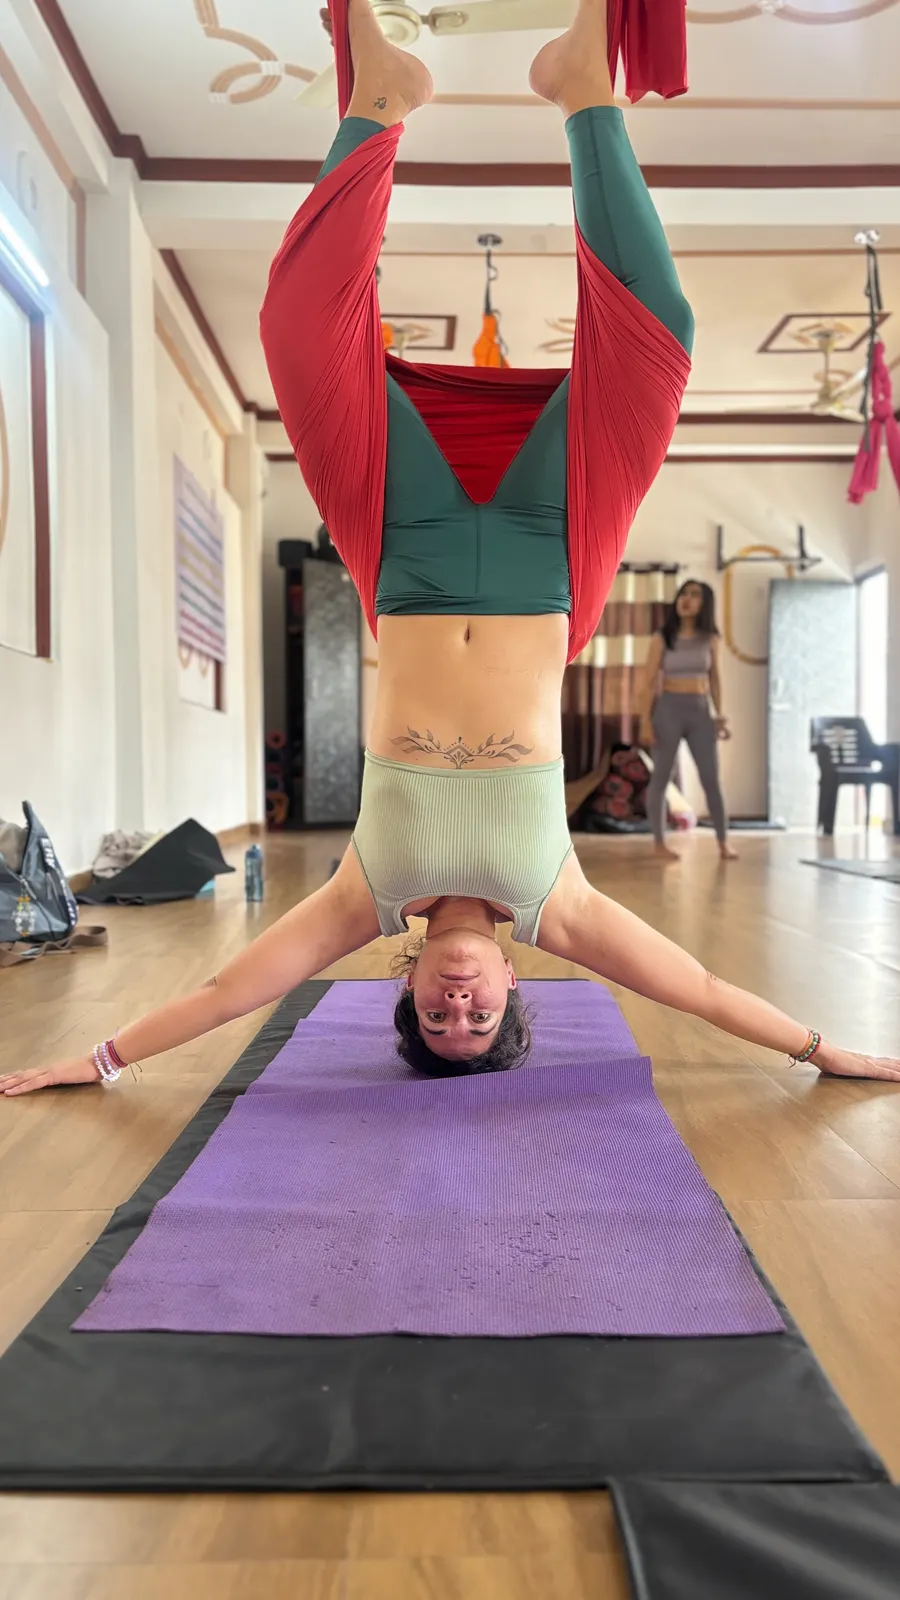
18. Inverted star
What it is: hanging fully inverted with the legs secured and both arms spread wide. How it feels: this is where the spine finally lets go. Key cue: only release the hands once the wraps are secure and a teacher has checked them.
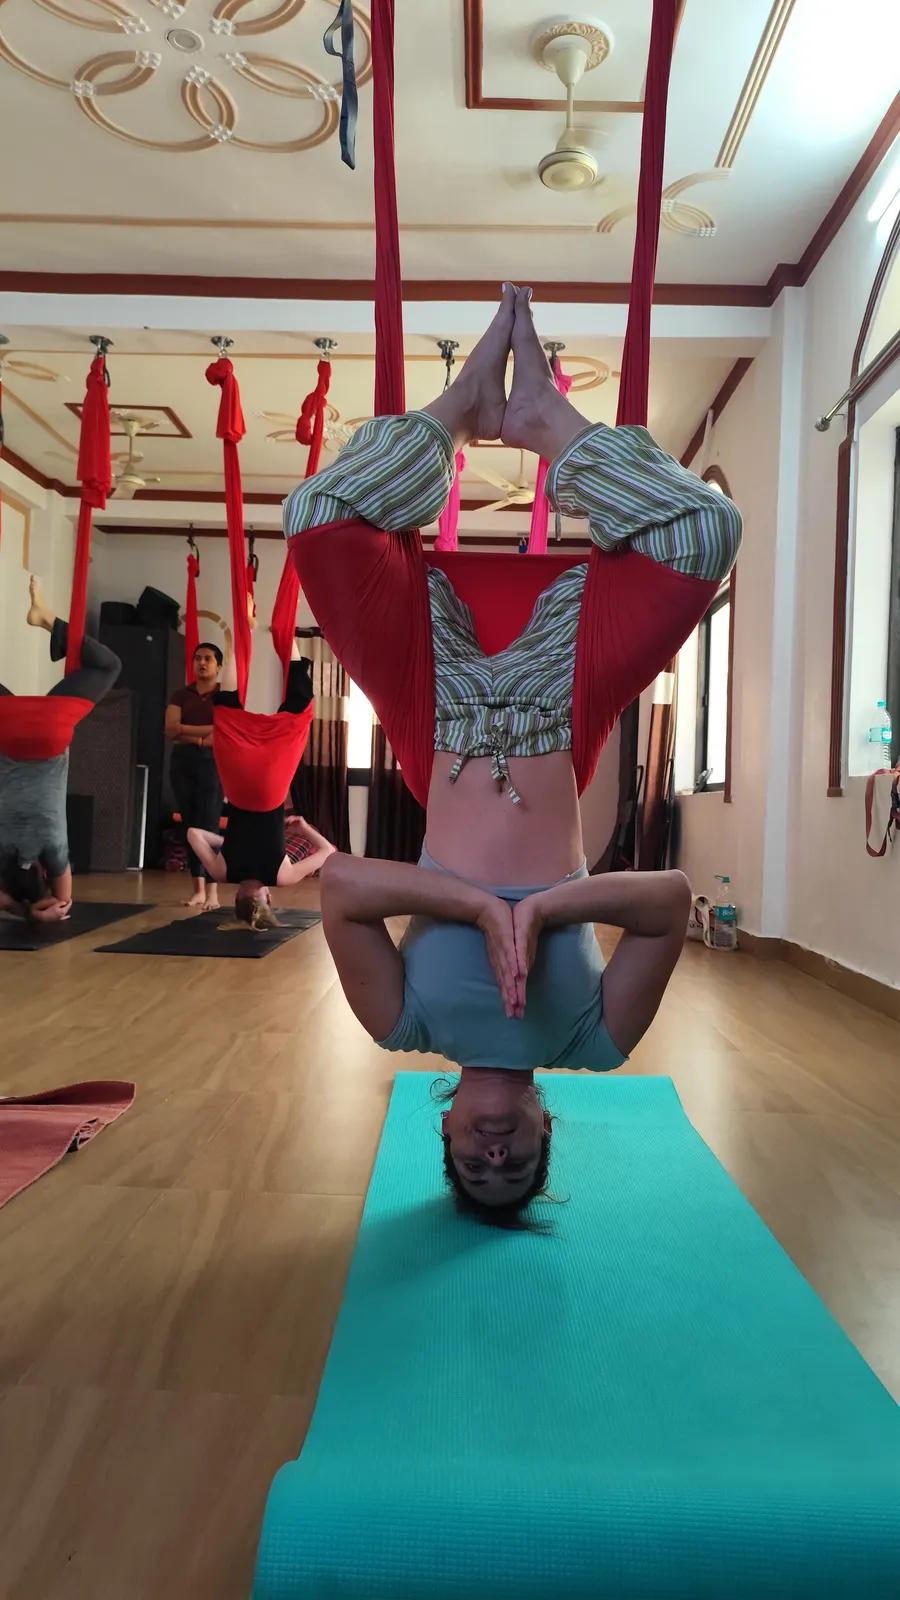
19. Inverted lotus with prayer hands
What it is: hanging upside down with the legs crossed around the hammock and the hands in prayer. How it feels: steady and calm — crossing the legs locks the fabric in place. Key cue: keep active pressure in the crossed legs the whole time you are inverted.
20. Inverted bow with reverse prayer
What it is: a full inversion with the hands in reverse prayer behind the back. How it feels: traction for the spine and a strong chest and shoulder opening at once. Key cue: this needs open shoulders; use a gentler arm position, such as holding the elbows, if reverse prayer strains the wrists.
21. Assisted handstand
What it is: kicking up into a handstand with the hammock under the hips taking part of the load. How it feels: like a handstand you can actually practise. Key cue: set the hammock height carefully so it meets the hips at the top, and keep the fingers spread and pressing into the floor.
Restorative aerial yoga poses
Every aerial class we teach ends here. Restorative aerial poses are long, still and fully supported, and they are suitable for almost everyone, including those who skip inversions.
22. Floating lotus meditation
What it is: sitting cross-legged inside the hammock, suspended just off the floor. How it feels: a quiet, slightly surprising stillness. Key cue: lower the hammock so your feet could reach the floor if needed, and let the fabric stop swinging before you close your eyes.
23. Cocoon
What it is: lying fully inside the hammock with the fabric wrapped around you. How it feels: for most students, the most complete relaxation in any style of yoga. Key cue: support the head and neck in the fabric and give students time to come out slowly — this is where the nervous system settles.
Aerial yoga poses at a glance
| Pose | Level | Main benefit |
|---|---|---|
| Aerial wide-leg seat | Beginner | Learning to sit in and trust the fabric |
| Aerial butterfly | Beginner | Gentle, passive hip opening |
| Aerial straddle sit | Beginner | Inner-thigh stretch, grip and core |
| Straight-arm hang | Beginner | Lengthens the spine and shoulders |
| Aerial warrior sling pose | Beginner | Core control and coordination |
| Aerial standing split | Beginner–intermediate | Hip stability and single-leg strength |
| Standing split, back foot in silk | Intermediate | Standing-leg strength, hamstring length |
| Tree pose with silks | Beginner | Balance and foot strength |
| Aerial dancer’s pose | Intermediate | Balance with shoulder and back opening |
| Flying superman | Intermediate | Strengthens the whole back body |
| Aerial wide-leg straddle | Beginner–intermediate | Deep inner-thigh and hip release |
| Aerial split balance | Intermediate | Supported hamstring and hip-flexor stretch |
| Flying pigeon | Intermediate | Hip opening plus shoulder stretch |
| Aerial pigeon backbend | Intermediate | Hip and chest opening |
| Supported aerial backbend | Intermediate | Secure route into a deeper backbend |
| Spotted aerial backbend | Beginner (with a teacher) | First backbend with hands-on support |
| Inverted aerial backbend | Intermediate–advanced | Spinal decompression |
| Inverted star | Intermediate–advanced | Full release of the spine |
| Inverted lotus with prayer hands | Intermediate | Stable, hands-free inversion |
| Inverted bow with reverse prayer | Advanced | Traction with chest and shoulder opening |
| Assisted handstand | Advanced | Safe handstand practice and upper-body strength |
| Floating lotus meditation | All levels | Stillness and focus |
| Cocoon | All levels | Deep relaxation |
Levels here are a guide, not a rule. Some students who have never done yoga find inversions easy and standing balances hard, and the reverse is just as common.
Safety before you try any aerial pose
The pose matters less than what it hangs from. Practise only on professionally installed rigging that is rated far beyond the weight of any practitioner, and that is checked before every session — as ours is. A hammock tied to a beam at home, or to a mount nobody has assessed, is the single biggest risk in aerial yoga.
Inversions call for particular caution. Speak to your doctor first, and expect a teacher to modify or skip inversions, if any of these apply:
- Pregnancy
- Glaucoma, a detached retina or recent eye surgery
- Uncontrolled high or low blood pressure, or a heart condition
- Recent surgery, or a recent head, neck or spine injury
- Vertigo or a history of fainting
- Severe osteoporosis
Wear fitted clothes that cover the armpits and the backs of the knees, take off rings and watches, and leave about two hours after a full meal before going upside down. Our longer guide to aerial yoga inversions and safety goes into each of these in detail.
Learning to teach these poses
Doing a pose and teaching it are different skills. A teacher has to set the hammock height for each student, cue the entry in the right order, spot from the right place, and recognise when an inversion is wrong for someone in the room. That is what aerial teacher training is for.
We are one of the very few schools that teaches aerial yoga exclusively. Our 50-hour aerial yoga teacher training covers the foundational seats, standing poses, basic inversions and the cocoon, and prepares you to teach beginner classes. Our 100-hour aerial yoga teacher training adds advanced inversions, restorative aerial, deeper anatomy and a longer supervised teaching practicum. Both are taught throughout by Mayuri Shewale (E-RYT 500, our founder) and Priya Sharma (RYT 500, aerial specialist), and both are Yoga Alliance continuing-education (YACEP) certified. If you want to know more about the path, read how to become an aerial yoga instructor.
Frequently asked questions
What are the best aerial yoga poses for beginners?
Can beginners do aerial inversions?
How many aerial yoga poses are there?
Why does the hammock hurt my hips in some poses?
What are the most advanced aerial yoga poses?
Can I practise these aerial yoga poses at home?
Aerial yoga teacher training in Rishikesh
Learn to teach the hammock, at a school that teaches nothing else
Seven-day and twelve-day YACEP-certified trainings in Tapovan, with your room and all meals included. Tell us when you want to come — no deposit is taken at enquiry.